Organizations & Workspaces
Mistral AI Studio offers two levels of access control: Organizations and Workspaces.
An Organization is the highest level of access. When you create an account, a default organization is created automatically. Depending on your company email address, you may be prompted to join an existing organization. Organization admins can invite other Mistral AI users to join.
Admins can manage the following at the organization level:
- Billing for all Workspaces
- Subscriptions
- General usage limits
- Organization member seats
- And more...
A Mistral AI Studio Workspace is a group of accounts within the same organization, each with specific rights and permissions. Creating a workspace for your team allows you to:
- Manage access and costs within the Workspace
- Share fine-tuned models and datasets among team members
- And more...
When you generate an API key from your workspace and use it to create a fine-tuned model, upload a dataset, or perform other cloud operations, your team members will also have access to these resources. This ensures that everything is accessible and usable by all authorized team members, making collaboration easier.
Manage your Organizations/Workspaces
Create and Manage your Organizations and Workspaces
When you first join AI Studio, you may be prompted to either create or join an Organization/Workspace.
Alternatively, if you are already in AI Studio, click on the top left corner (1) to see your Organizations and Workspaces. You will then be able to view, manage, and create (2) organizations and workspaces.

To visit the Admin settings, click on the top right corner (1), and then "Admin Settings" (2).

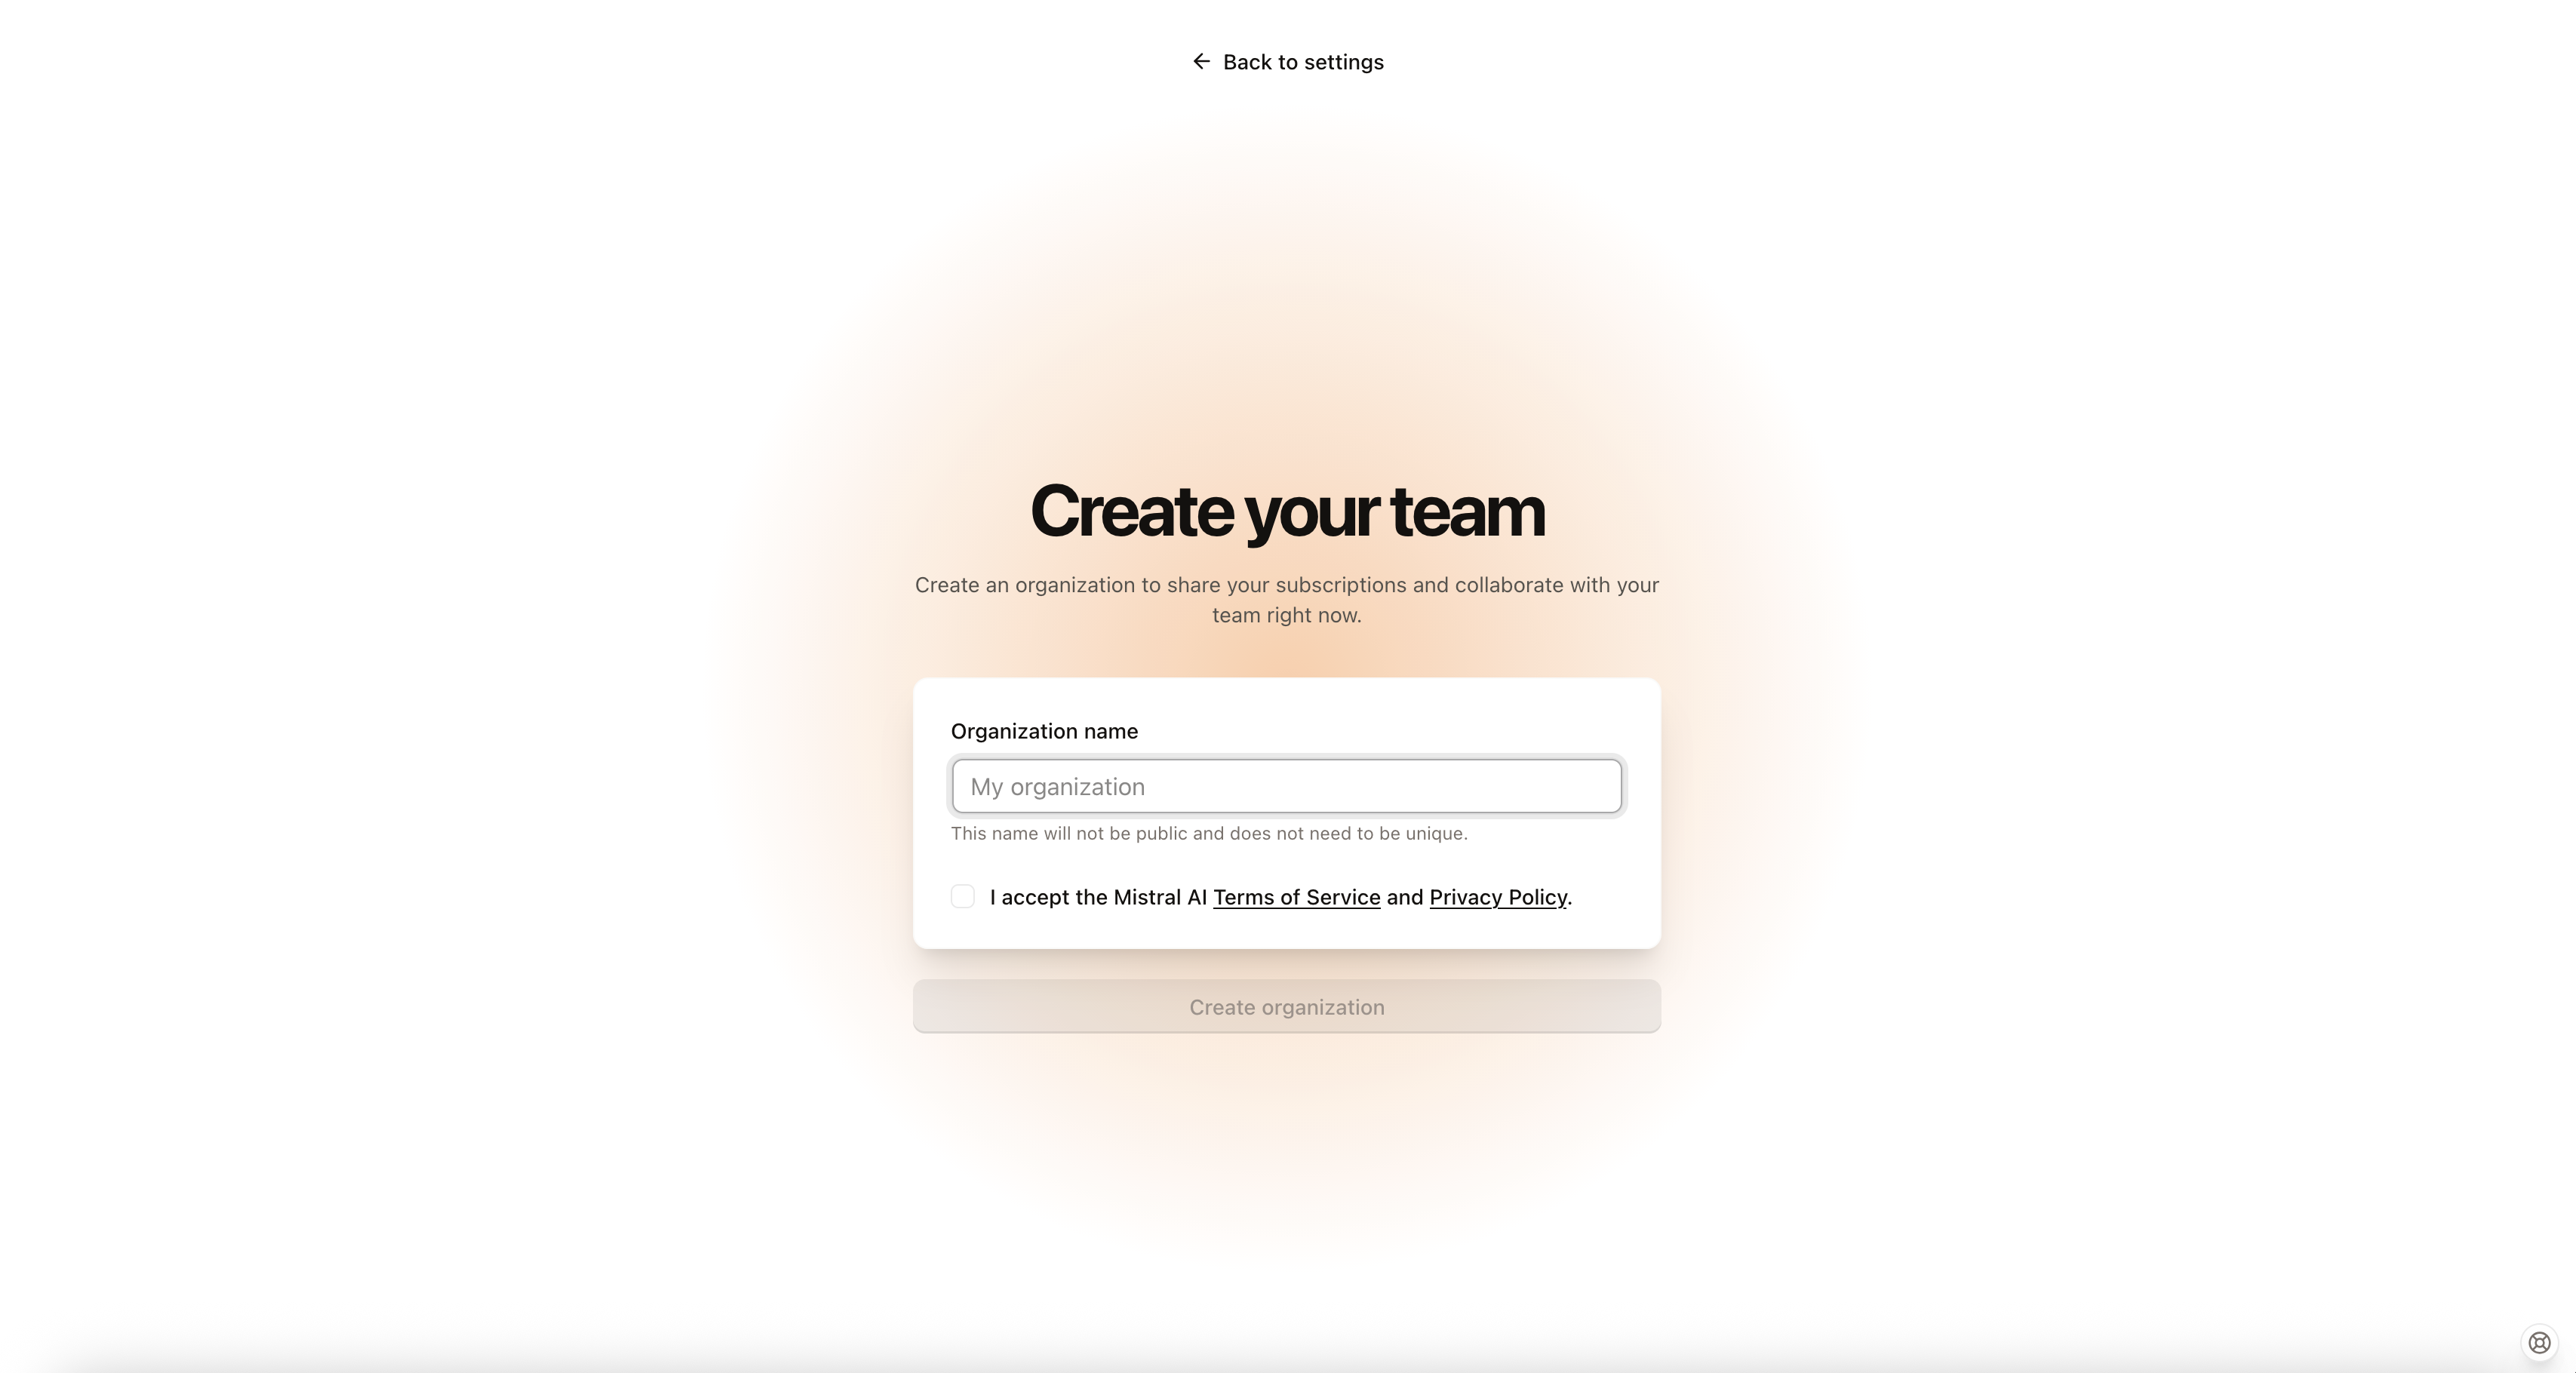
Create an Organization
You can freely create an Organization at any time. You will be prompted to provide a name and accept Mistral AI’s terms of service.
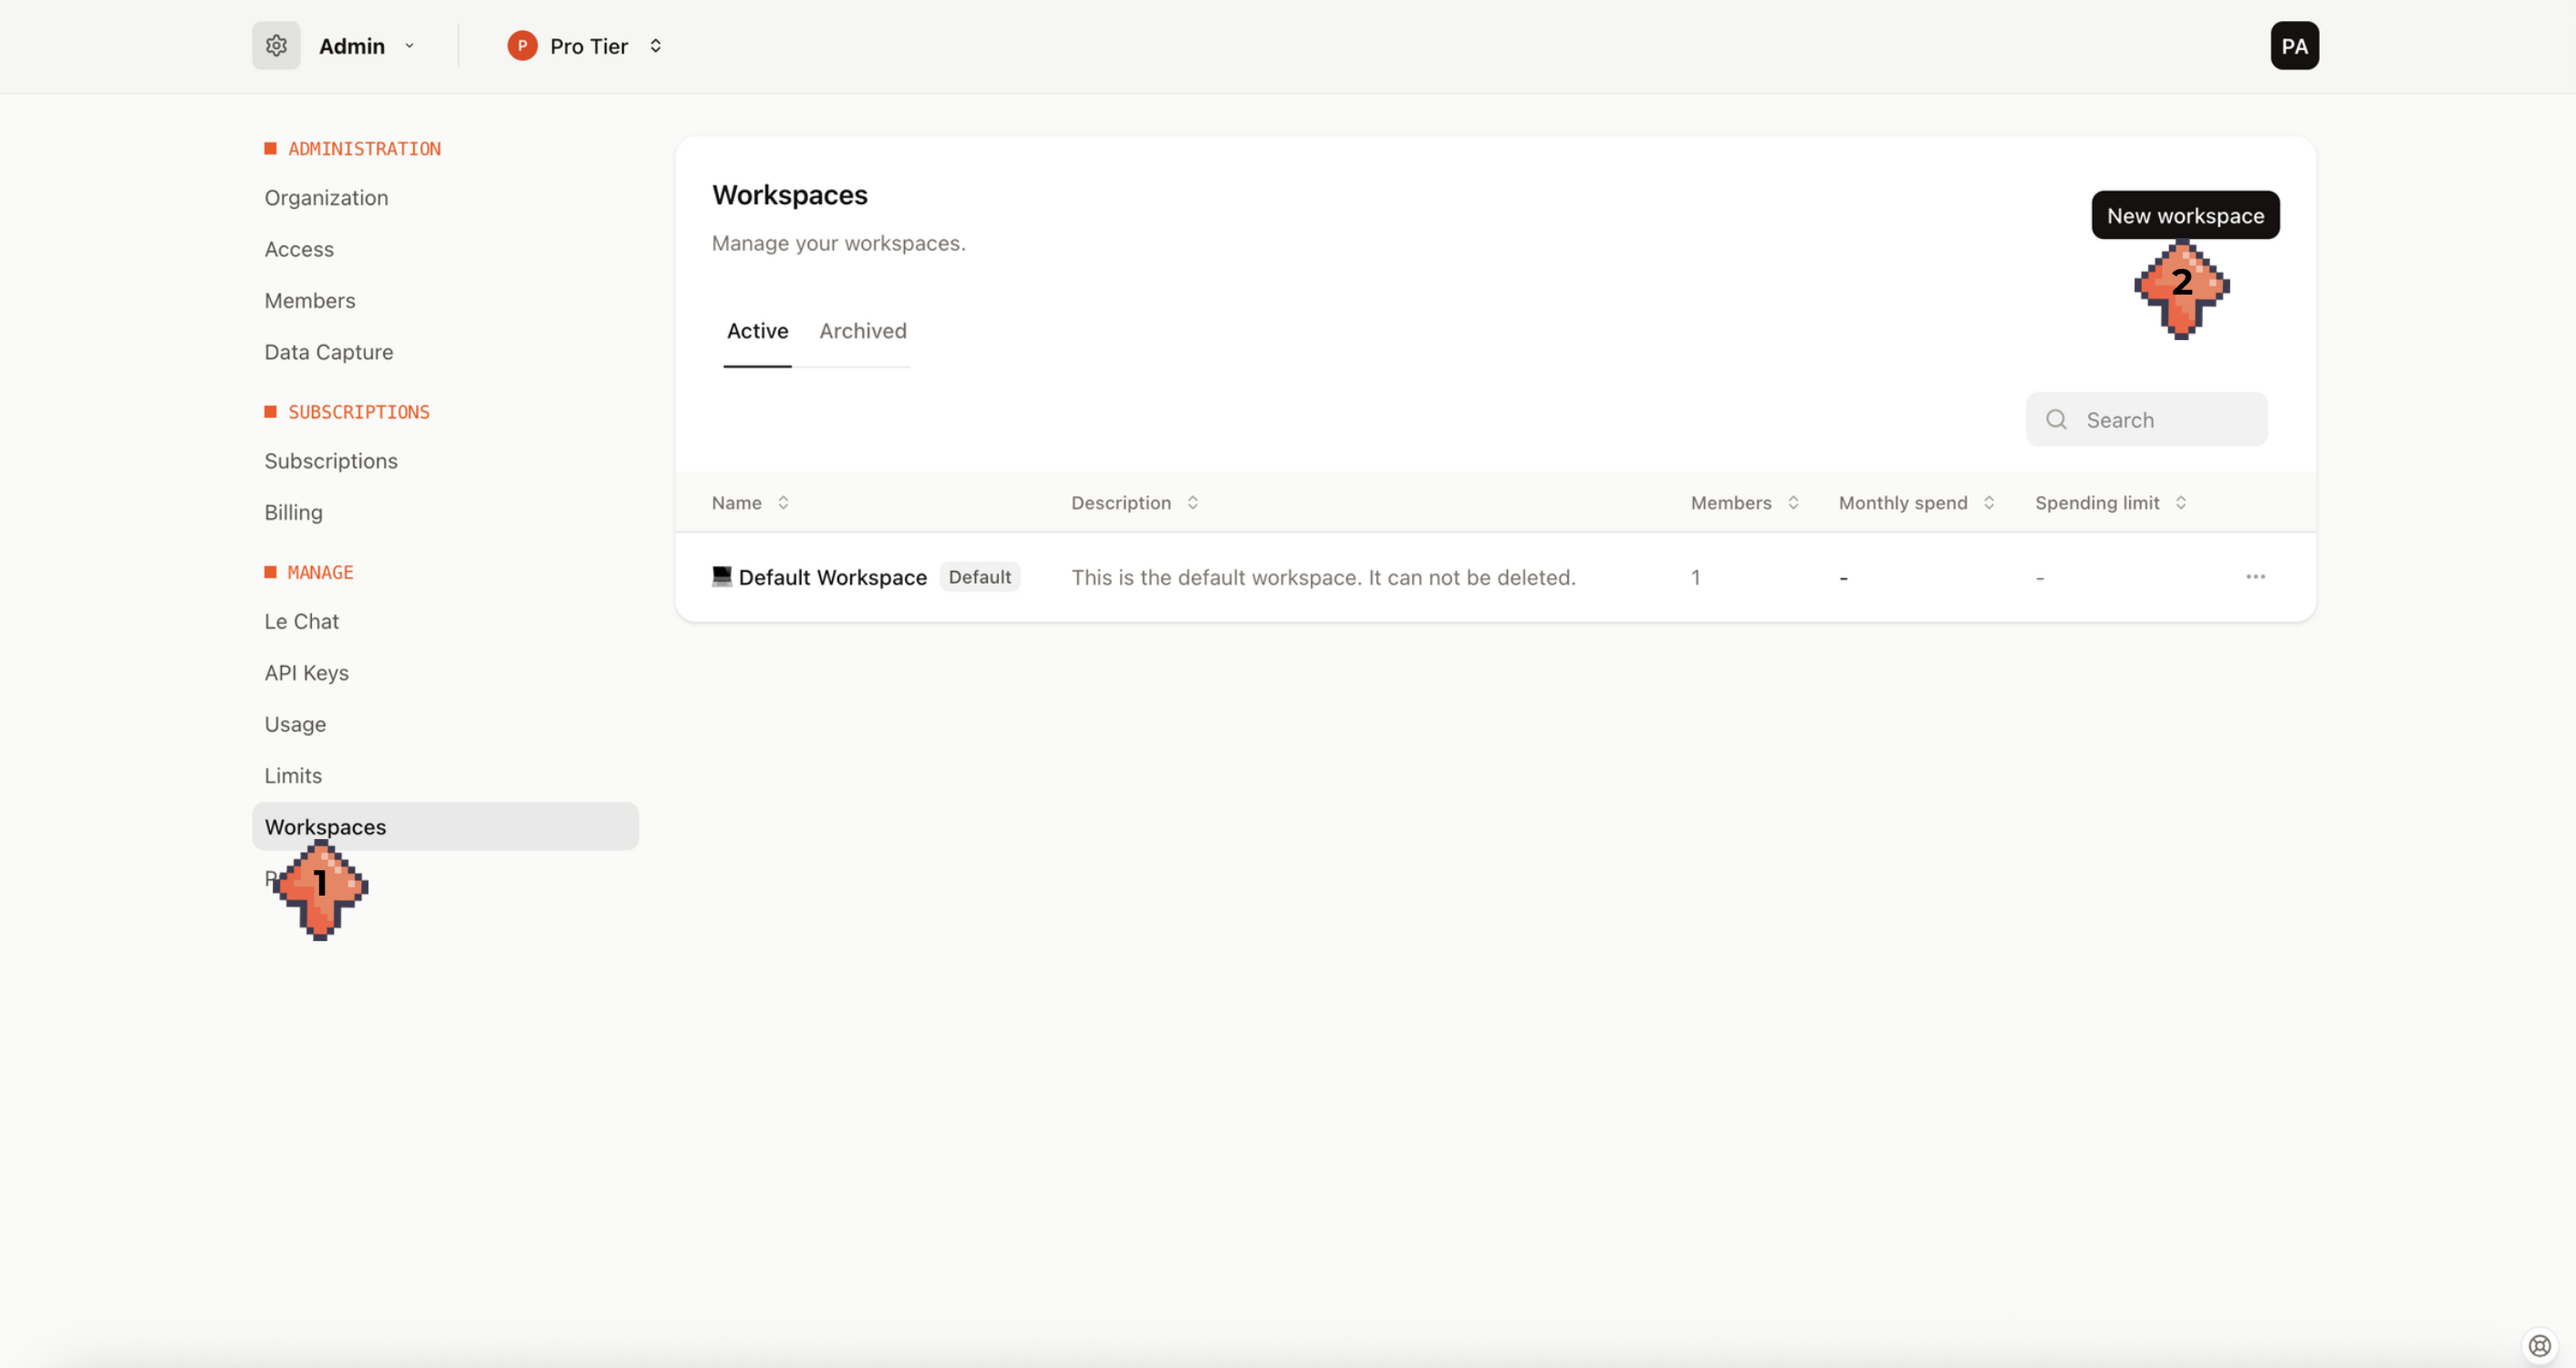
Create a Workspace
On the other hand, only certain members with sufficient permissions are allowed to create Workspaces and manage them. If you have such permissions, you can create a workspace as indicated below by visiting the Admin page or following the previous step (2). Under Workspaces (1), click "New Workspace" (2).
Invite Members
Invite new members to your Organization or Workspace
Once your organizations and workspaces are created, you are free to invite people and add them to workspaces as you see fit.
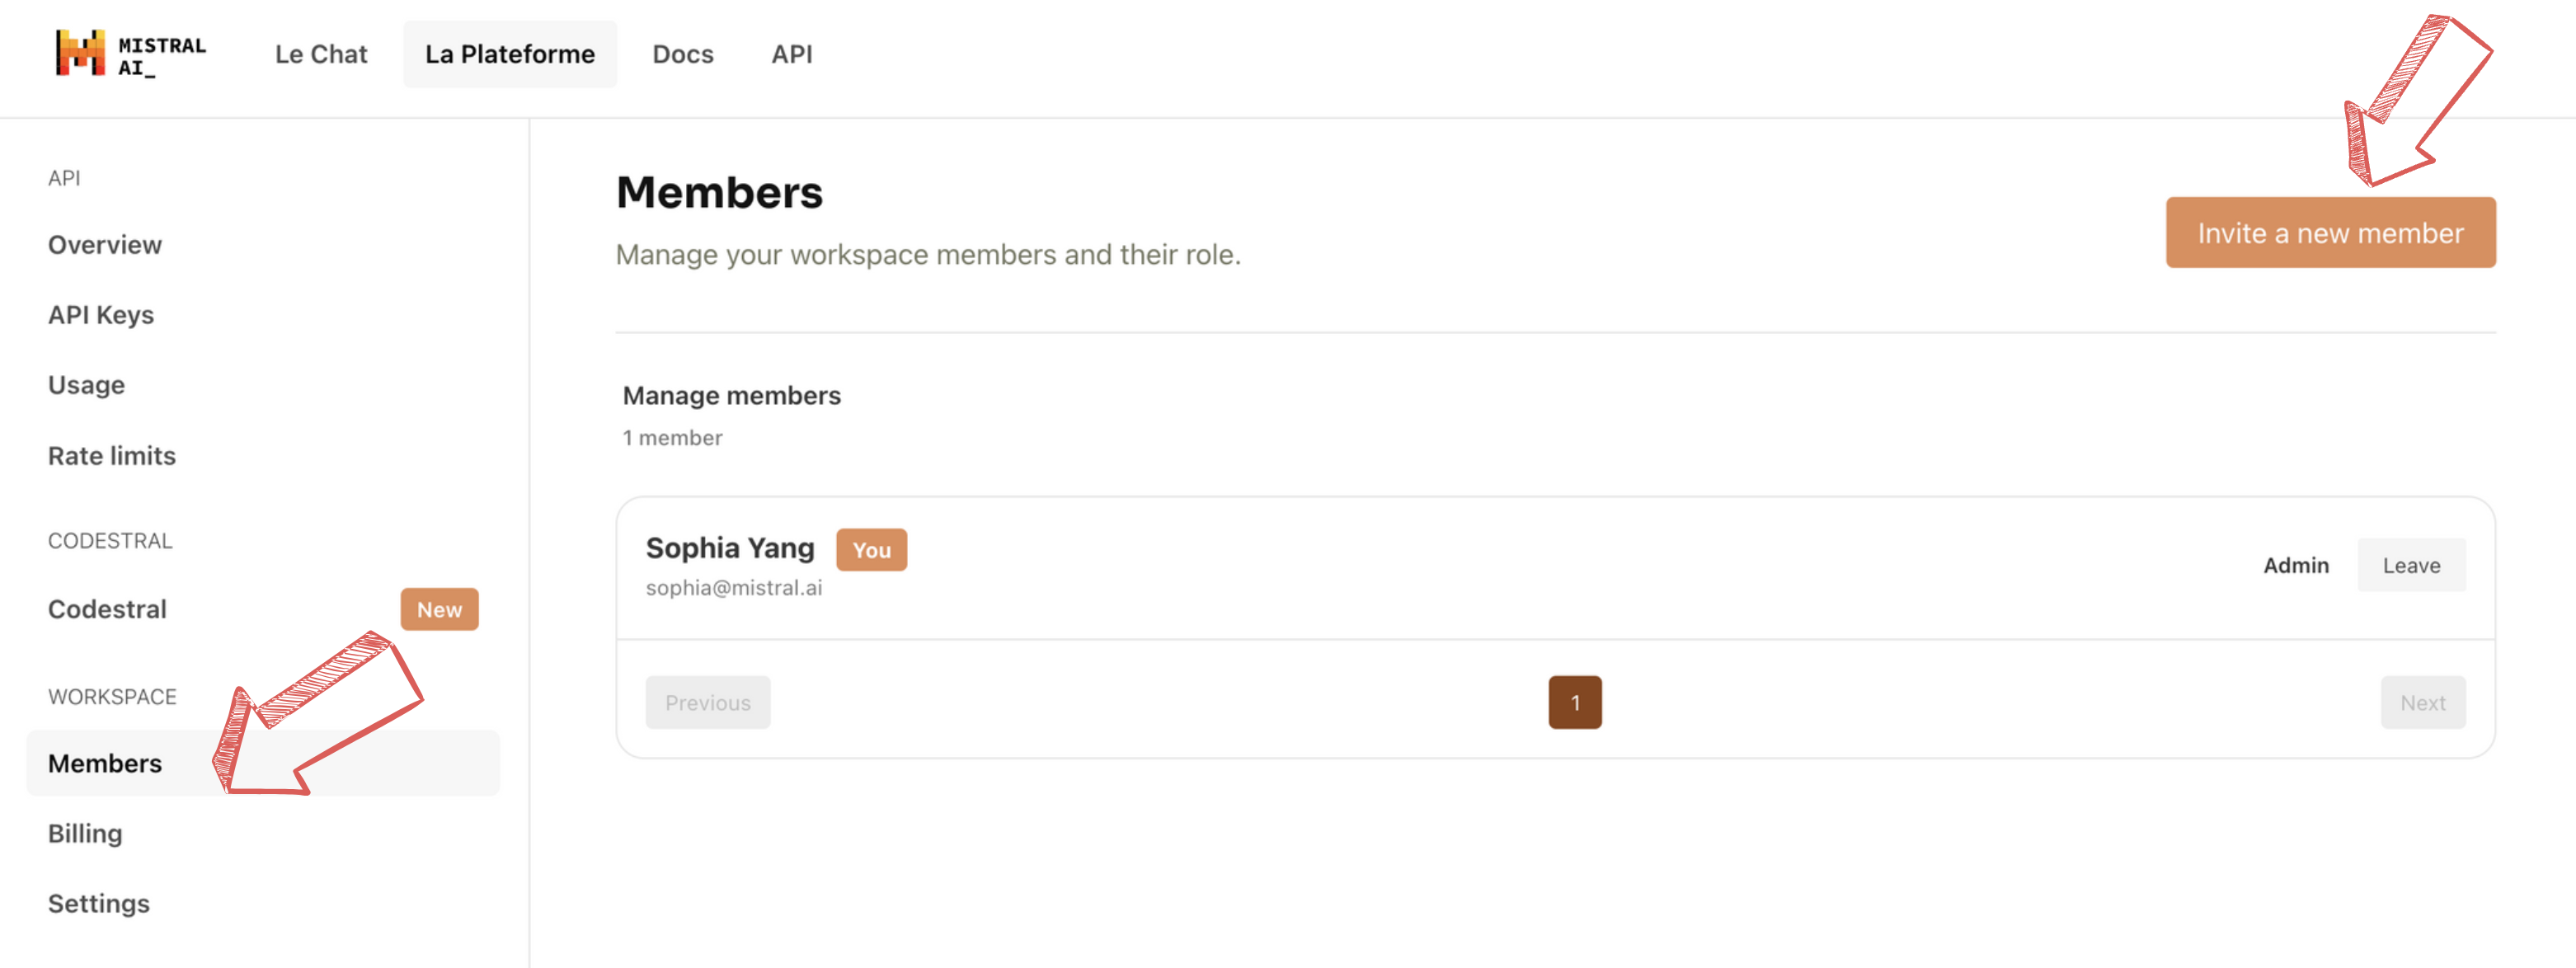
Invite to your Organization
To invite someone to your organization, visit the Admin page. Under Members (1), click "Invite members" (2).
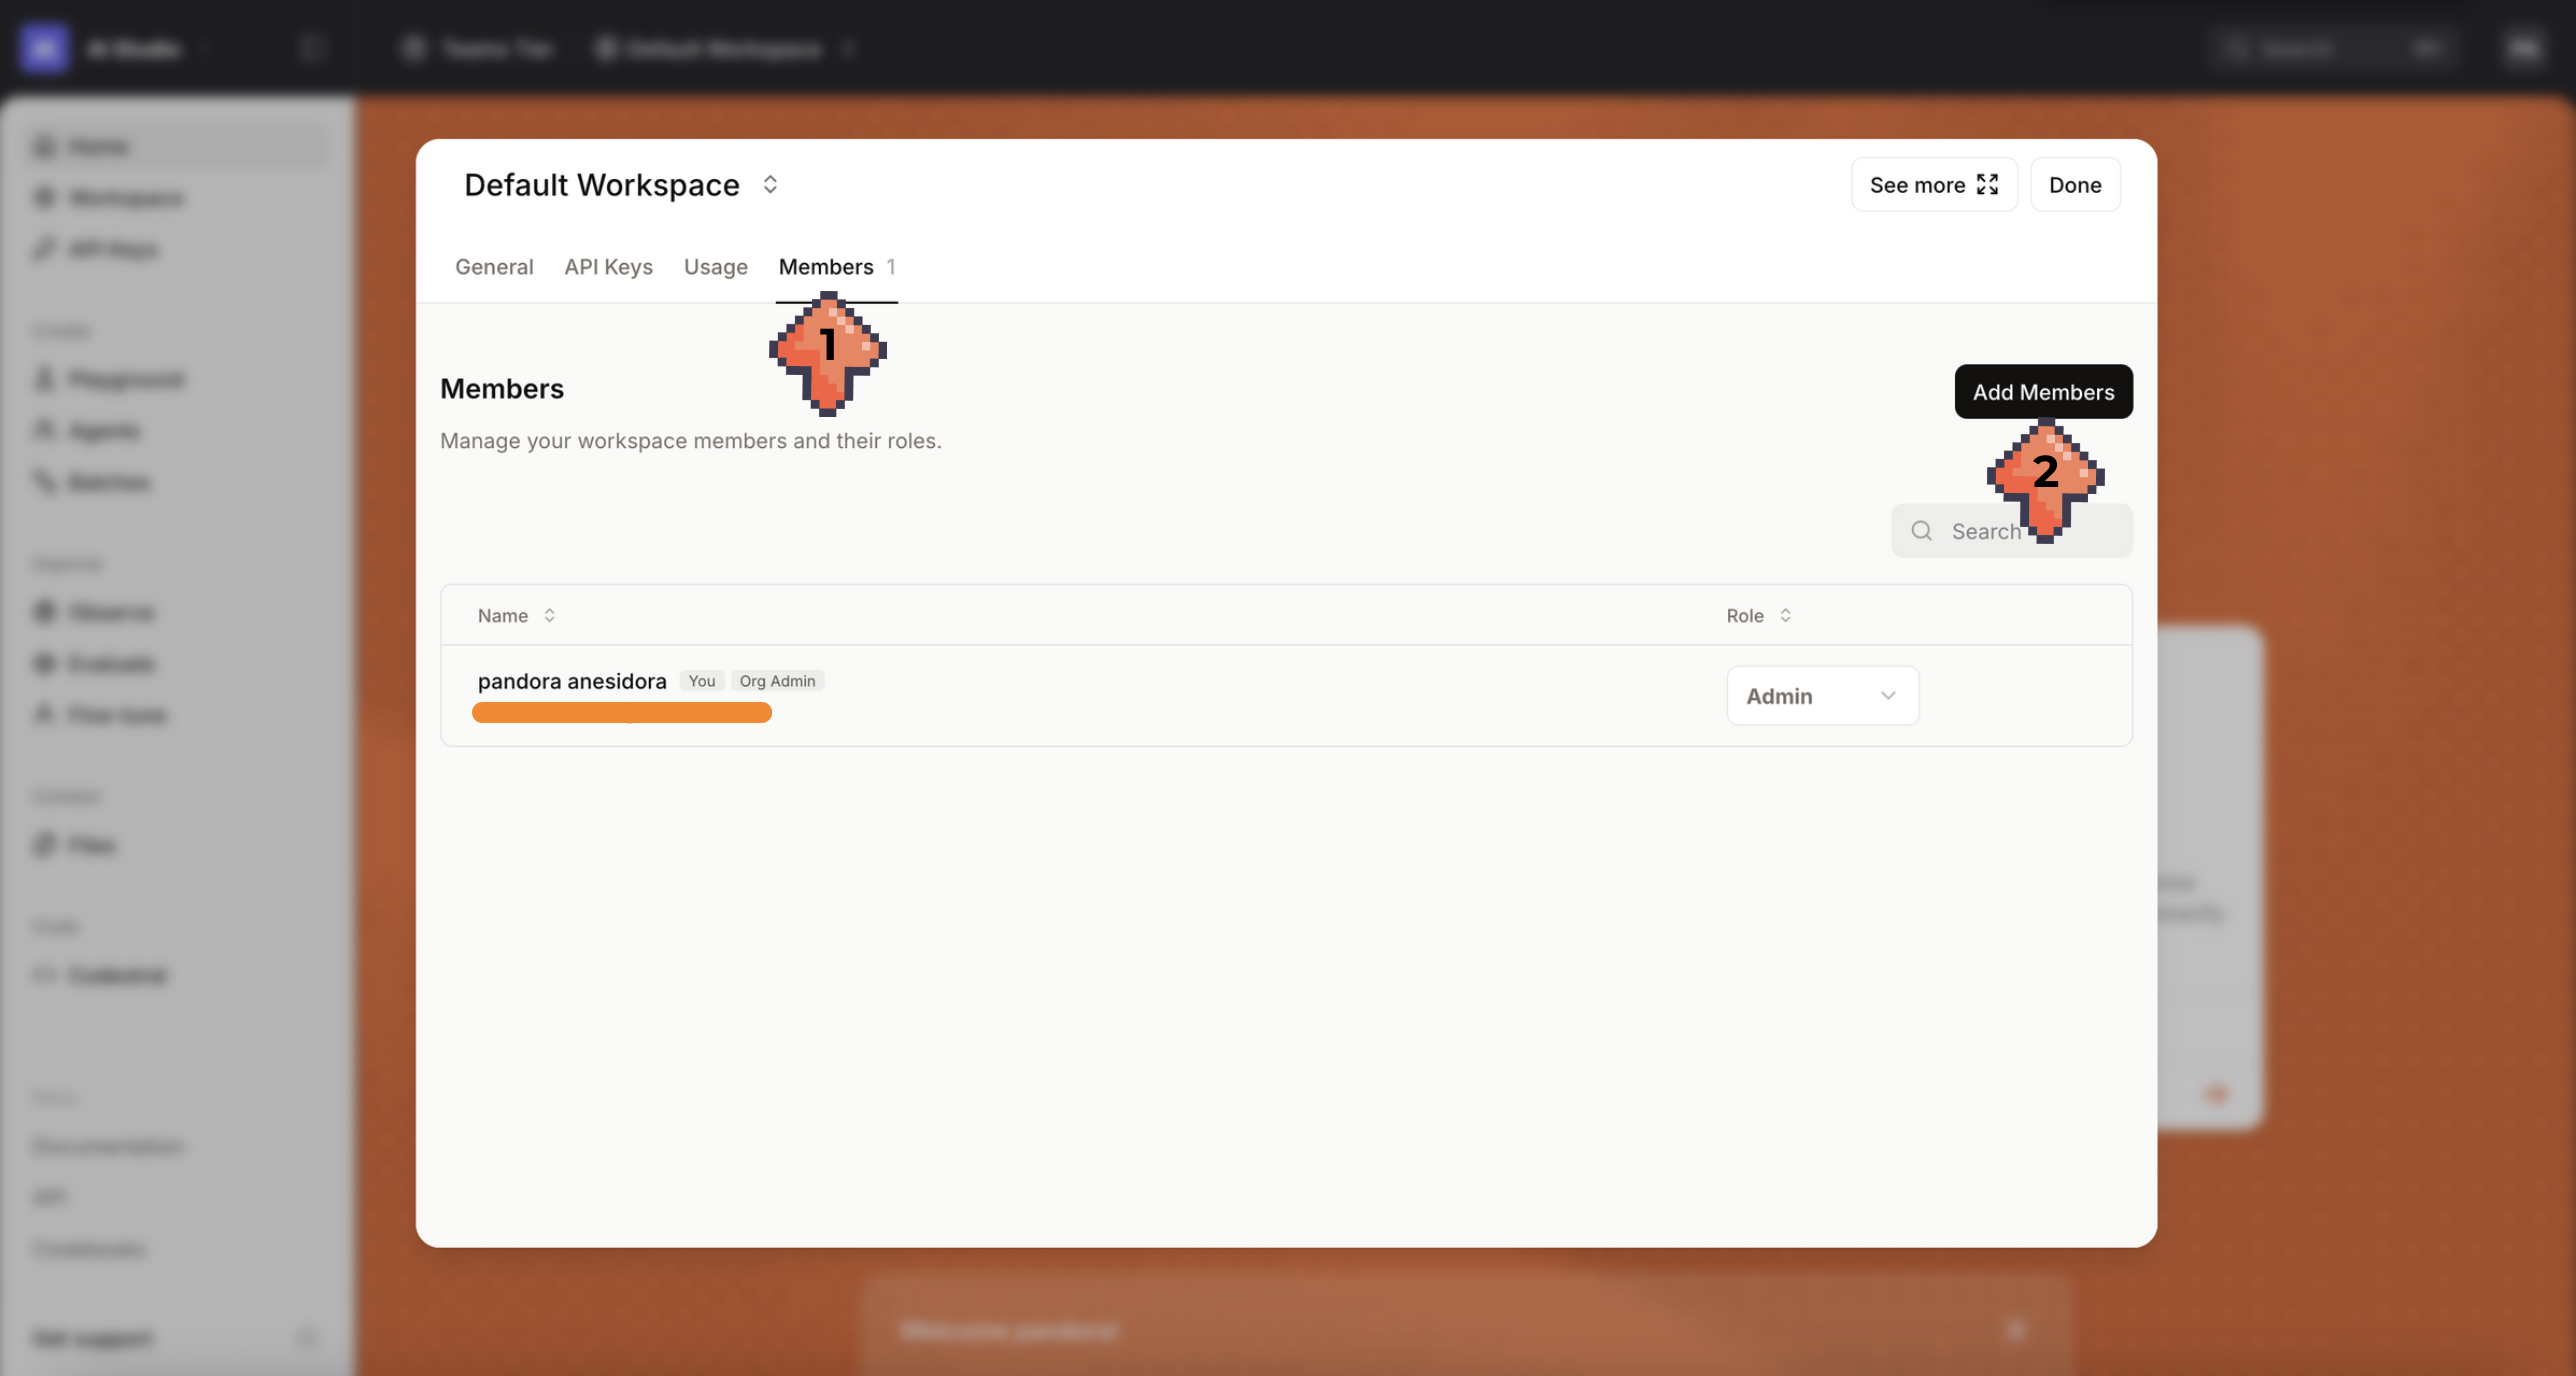
Add to a Workspace
To add a member to a workspace, visit the corresponding Workspace. Under Members (1), click "Add Members" (2).