Quickstart
This guide walks through the Observability workflow in Studio.
Are you a developer? Look for the API & SDK Implementation callout included in each step:
- it shows the exact SDK method(s) for the same action,
- and links to the corresponding section in the API/SDK docs.
What you'll get
By the end of this guide, you will have:
- A filtered view of your production traffic showing relevant conversations.
- A Judge that automatically identifies and scores/labels these conversations for you.
- A completed Campaign that applies the Judge across your traffic at scale.
- A Dataset built from the Campaign results.
Before you start
Make sure you have:
- An Enterprise-tier Organization.
- Admin access to the Observability features in your Organization.
- A production traffic with chat completion events.
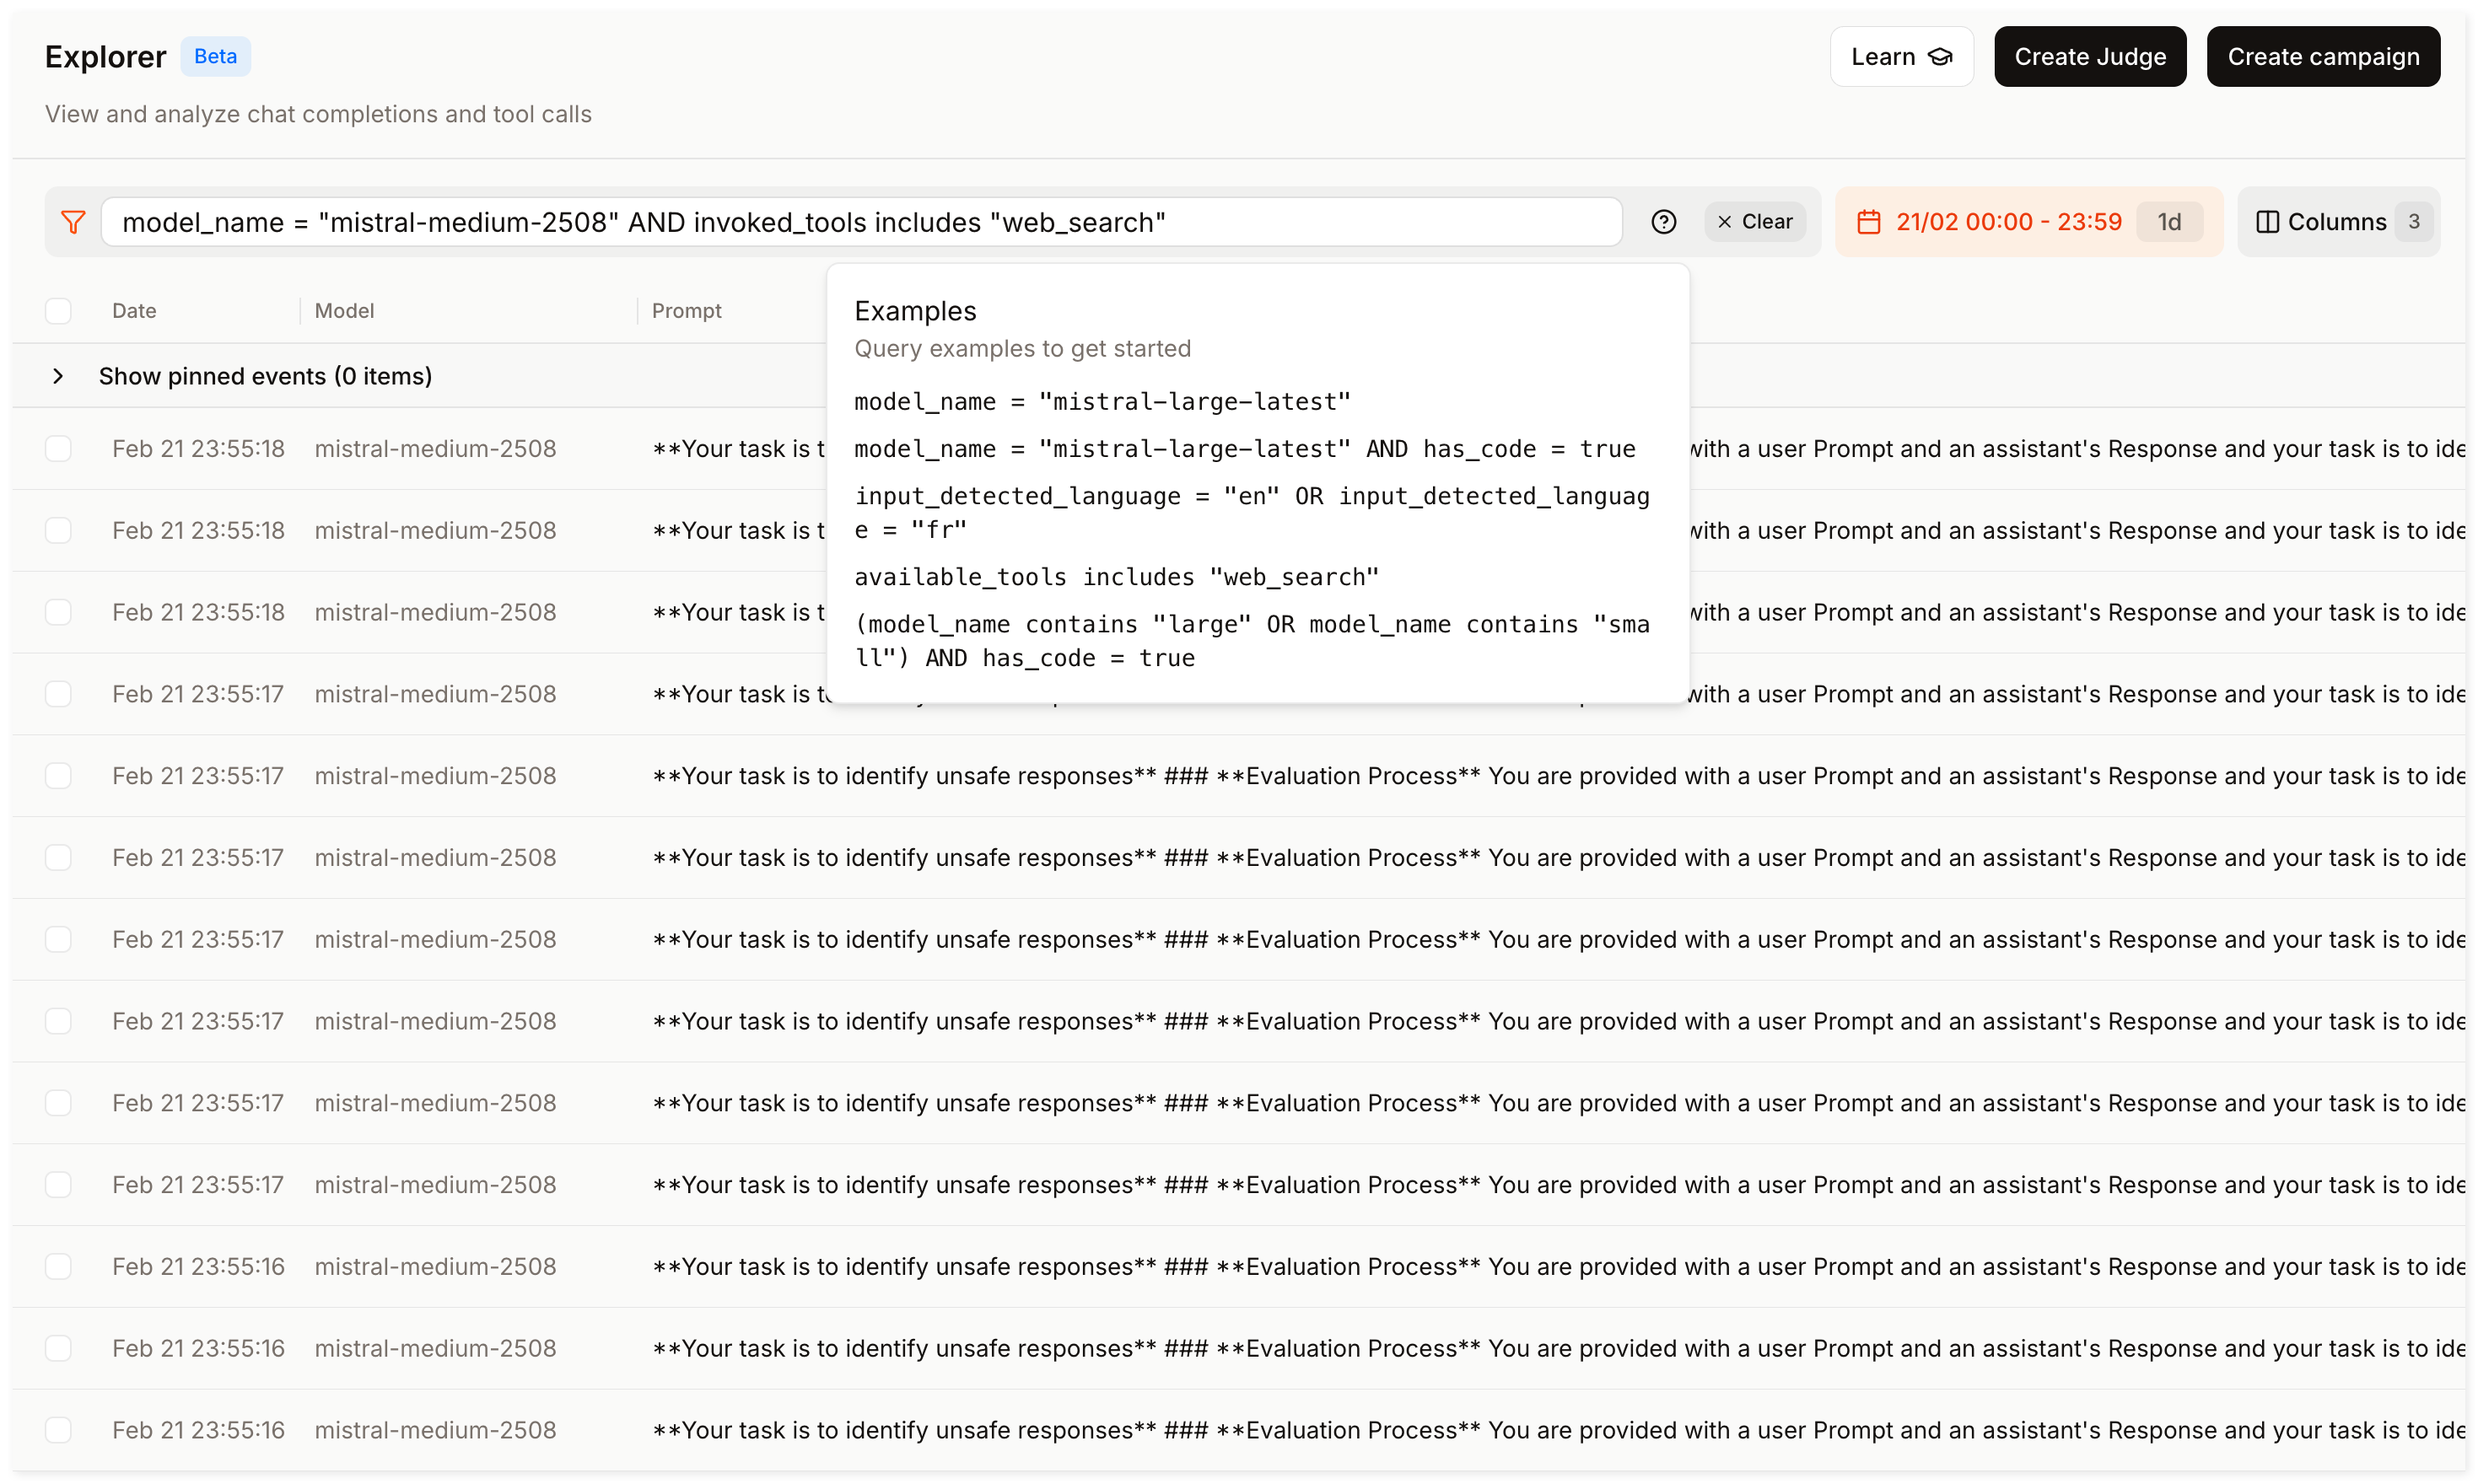
Step 1: Explore production traffic
Click Observe then open Explorer in the sidebar.
Your goal is to find a filter combination that surfaces relevant conversations (e.g. failure modes, low-quality responses, or specific behaviors you want to investigate).
- Start with a broad time range (e.g., last 7 days) and one model (e.g.,
mistral-medium-2508). - Experiment with filters until you find a combination that suits your needs. For example:
invoked_tools includes "web_search"to isolate tool-using conversations.last_user_message_preview contains "reset password"to find conversations about a specific topic.total_time_elapsed > 5to find slow responses.
- Click into individual events to inspect messages, tool calls, and metadata.
Refining your filters improves Judge and Campaign accuracy. This step helps you define "relevant" before automating evaluations.
In the SDK, use the chat_completion_events.search() method to filter your events programmatically.
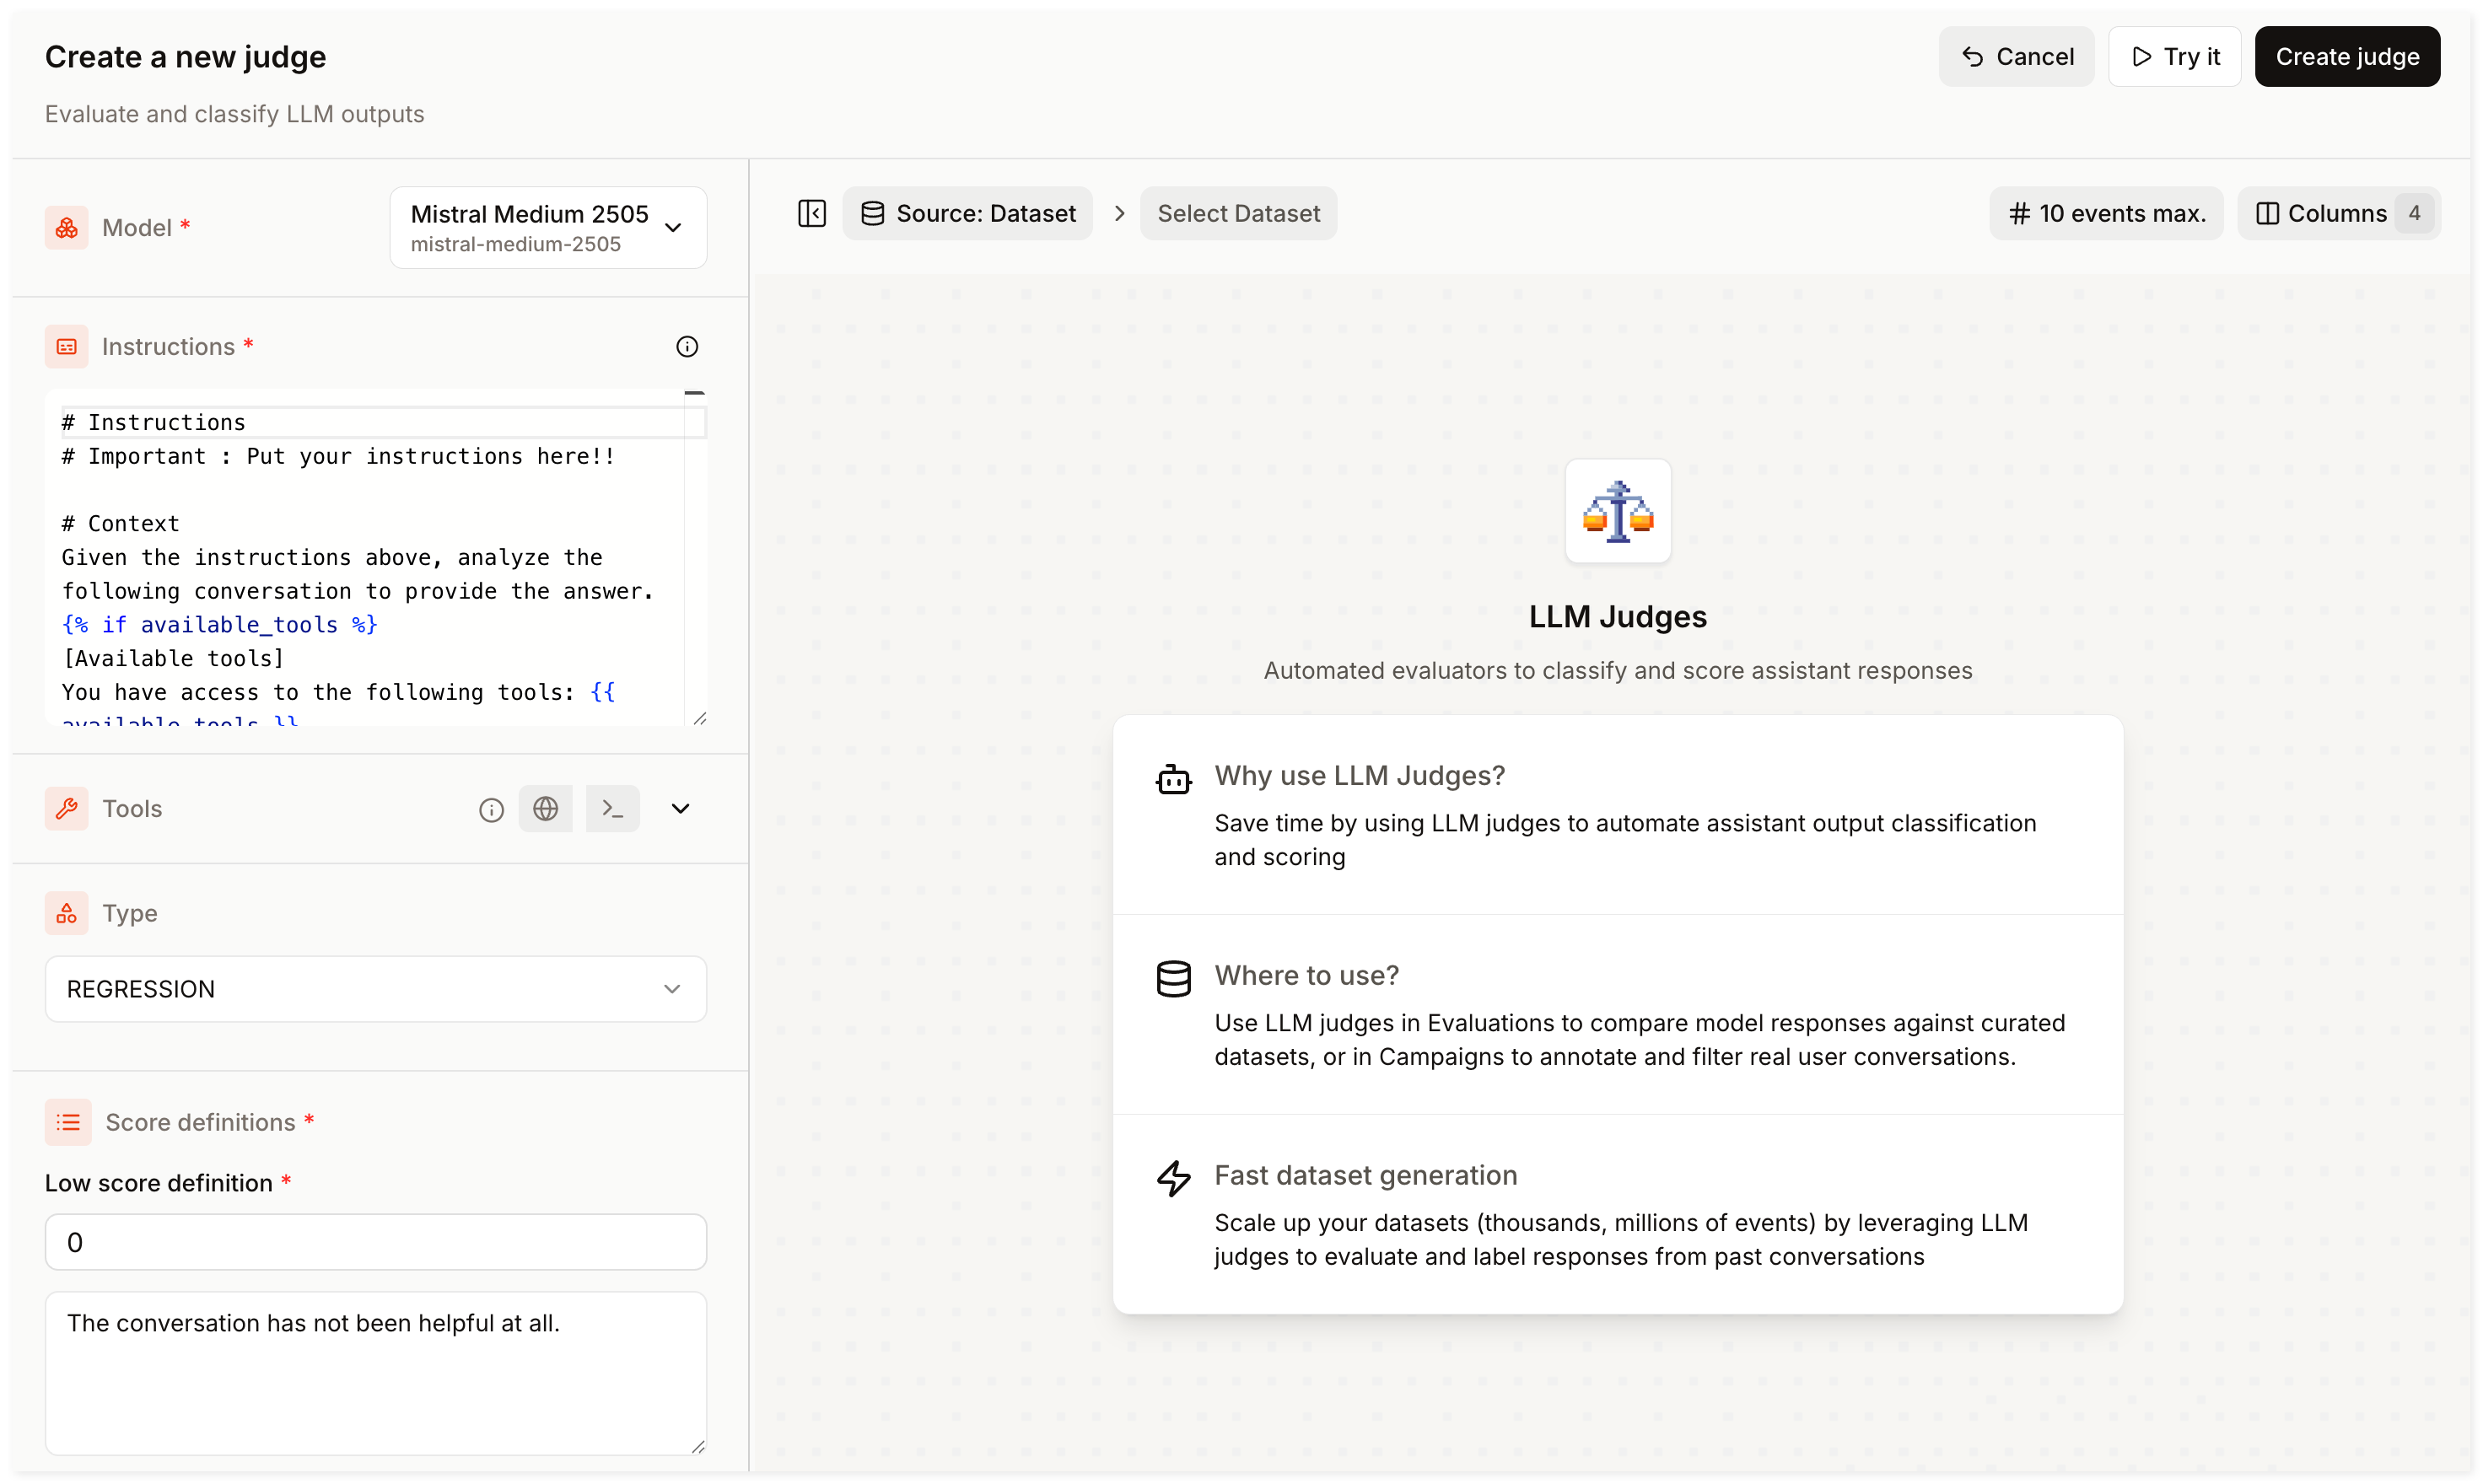
Step 2: Create a Judge
You have identified a filter combination that surfaces relevant conversations. You will now create a Judge to evaluate them automatically.
-
Go to Judges in the sidebar and click Create Judge.
-
Select a model among the available options.
-
Provide clear instructions detailing how to evaluate the conversations. For example:
Rate how helpful the assistant's response is to the user's question. Consider whether the response is accurate, relevant, and complete. -
Add tools (Optional):
- Enable Web Search to give the Judge access to the internet.
- Choose Code Interpreter to let the Judge run its own Python code.
-
Select a Judge type and provide the corresponding labels or score ranges:
- Classification for discrete labels (e.g.
helpful/not helpful). - Regression for a numeric score (e.g., 0 to 5).
- Classification for discrete labels (e.g.
-
Click Create Judge, provide a name and description, and confirm.
Test your Judge on real records before running a Campaign.
In the SDK, use judges.create() and pass your instructions and other parameters in the function.
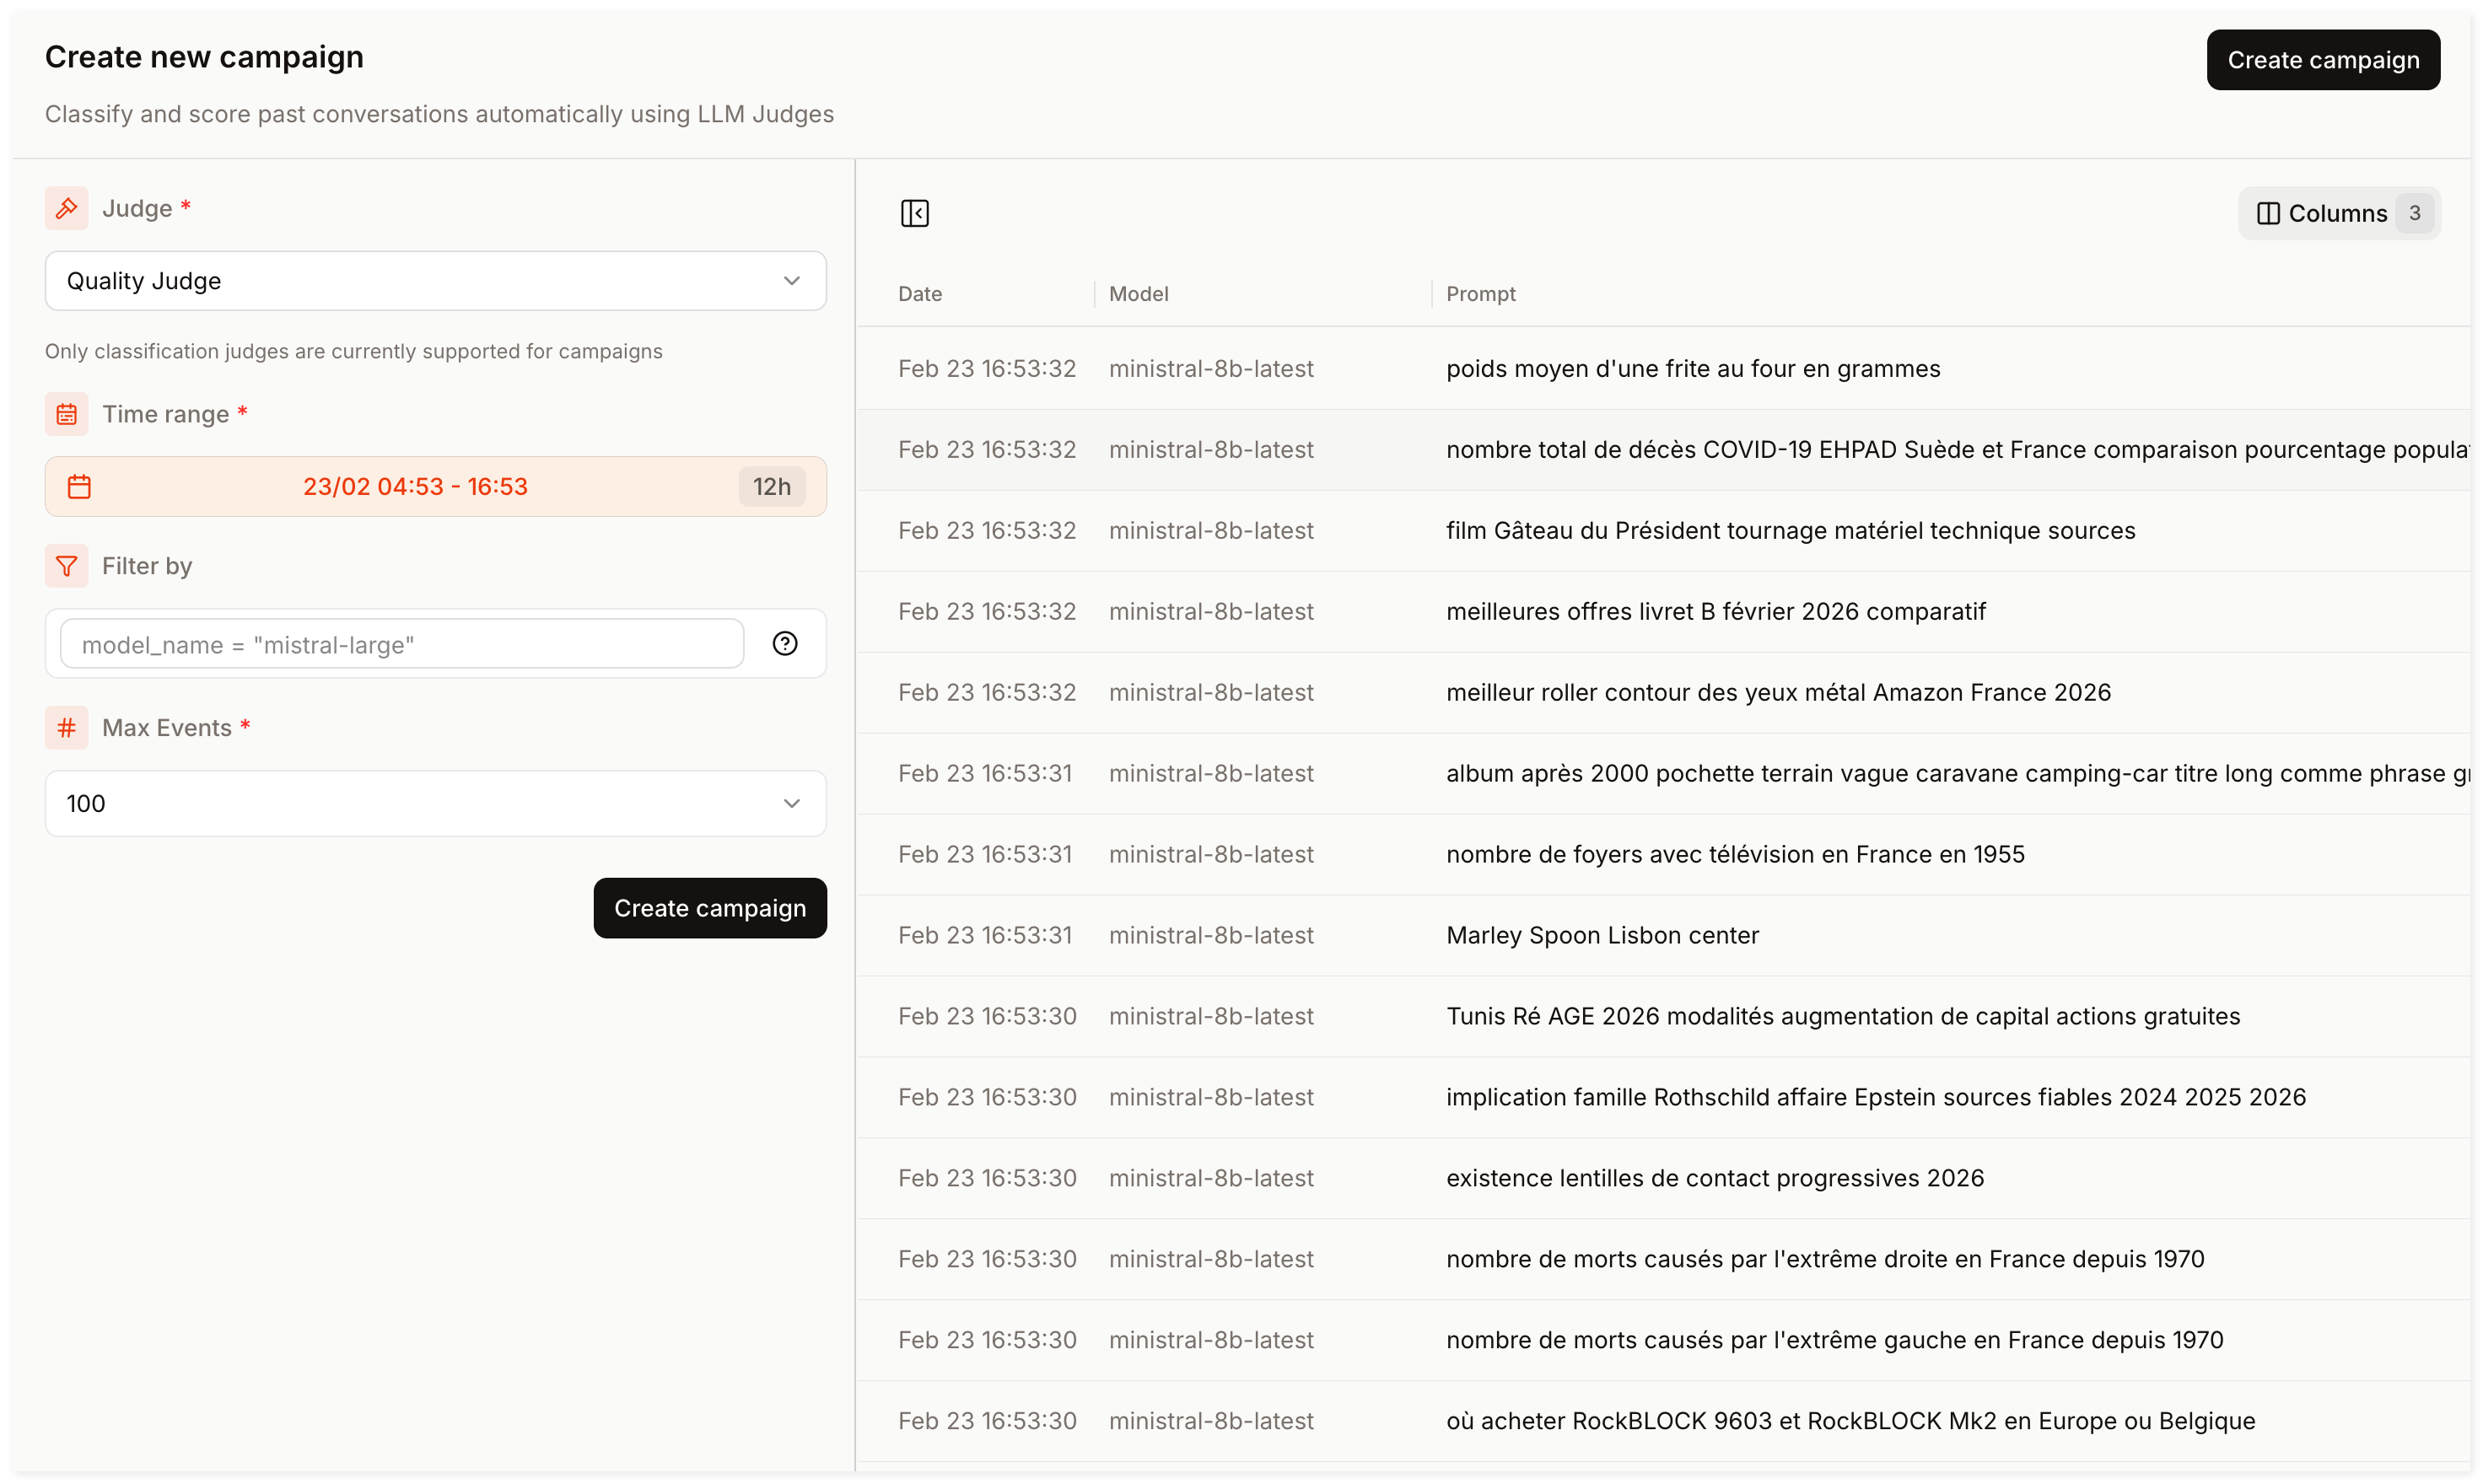
Step 3: Run a Campaign
A Campaign evaluates a set of filtered events and applies your Judge to them. To run a Campaign:
- Go to Campaigns in the sidebar and click Create Campaign.
- In the Campaign creation form :
- Select the Judge you created in Step 2.
- Select a time range (e.g., last 7 days).
- Define your filters (reuse the same filter conditions from Step 1, or widen the scope if needed)
- Limit the number of events to process (ranging from 100 to 10,000).
- Click Create Campaign, set a Campaign name and description, then confirm.
Campaigns run in the background. Check back later in the Campaigns dashboard for results.
In the SDK, use campaigns.create() to define filters and attach your Judge, then monitor progress with campaigns.fetch_status().
Step 4: Save results to a Dataset
Your Campaign has completed. All events are now annotated with the Judge's output and you can save them to a Dataset:
- Select the relevant events (you may apply additional filters).
- Click Actions and choose between adding the matching events to a new Dataset or append them to an existing one.
Campaigns annotations are linked to their original events. View them anytime in Explorer.
In the SDK (see Campaigns & Datasets), use campaigns.list_events() then datasets.import_from_explorer() to pipe the matching events directly into a dataset.
Congratulations
Congratulations! You have created a curated, annotated Dataset, built from real production data.
Want to learn more? Explore the following deep dives in the Observability docs:
- Explorer: Query specific events and filter production logs.
- Judges: Design complex instructions, schemas, and validation techniques.
- Campaigns: Annotate thousands of production events in bulk.
- Datasets: Manage record structures, curation, and file imports.